The Genius Scan SDK enables application developers to add a scanning module taking benefit of the power of the same technology embedded in the Genius Scan app.
The Core and the OCR modules of the SDK allow to add a fully customizable scan flow to any native app.
The Core module provides:
This guide assumes that you have followed the Getting Started guide :
gssdk-core (and optionally, gssdk-ocr) library in your app with Gradle.We’ve split the document processing operations into two classes: DocumentDetection which mainly handles the real-time document detection on the camera previewm, and ScanProcessing which applies various image processing algorithms such as perspective correction and filters to a single scan.
The edge detection takes in an image and returns a quadrangle representing the four corners of the detected document.
val documentDetector = DocumentDetector.create(context)
val quadrangle = documentDetector.detectDocument(imageToAnalyzePath)
DocumentDetector documentDetector = DocumentDetection.create(context);
Quadrangle quadrangle = documentDetector.detectDocument(imageToAnalyzePath);
The ScanProcessing class takes an image as input and a list of operations to apply to this image. It returns the processed image, as well as which treatments it performed.
You can apply the following operations to an image:
val scanProcessor = ScanProcessor(context)

// If the detection was already applied, we have a quadrangle:
val quadrangle;

// For a bitmap
val outputConfiguration = OutputConfiguration.bitmap()
// Or a file
val outputConfiguration = OutputConfiguration.file(destinationFolder)

val configuration = Configuration(
  PerspectiveCorrection.withQuadrangle(quadrangle),
  CurvatureCorrection.automatic(),
  Enhancement.automatic(),
  Rotation.automatic(),
  outputConfiguration
)

val result = scanProcessor.process(imageToProcess, configuration)
ScanProcessor scanProcessor = new ScanProcessor(context);

// If the detection was already applied, we have a quadrangle:
Quadrangle quadrangle;

// For a bitmap
OutputConfiguration outputConfiguration = OutputConfiguration.bitmap();
// Or a file
OutputConfiguration outputConfiguration = OutputConfiguration.file(destinationFolder);

Configuration configuration = new Configuration(
  PerspectiveCorrection.withQuadrangle(quadrangle),
  CurvatureCorrection.automatic(),
  Enhancement.automatic(),
  Rotation.automatic(),
  outputConfiguration
);

Result result = scanProcessor.process(imageToProcess, configuration);
The PDF generation module provides a couple objects to generate a PDF file.
An object wrapping the information to create a PDF page.
val page = PDFPage(imageFilePath, PDFSize(8.27f, 11.69f), null)
PDFPage page = new PDFPage(imageFilePath, new PDFSize(8.27f, 11.69f), null);
A PDF document representing a collection of PDF pages.
val document = PDFDocument(title, password, keywords, creationDate, updateDate, listOf(pages1, page2))
PDFDocument document = new PDFDocument(title, password, keywords, creationDate, updateDate, Arrays.asList(pages1, page2));
The generator takes in a PDFDocument object, and writes the corresponding PDF file.
val configuration = DocumentGenerator.Configuration(outputFile)
DocumentGenerator(context).generatePDFDocument(pdfDocument, configuration)
DocumentGenerator.Configuration configuration = new DocumentGenerator.Configuration(outputFile);
new DocumentGenerator(context).generatePDFDocument(pdfDocument, configuration);
The “capture” view displays a camera preview. It takes care of setting up the entire camera stack for you. The view comes free of buttons or any UI element so that you can design it as you want. You will need to take care of this in your implementation.
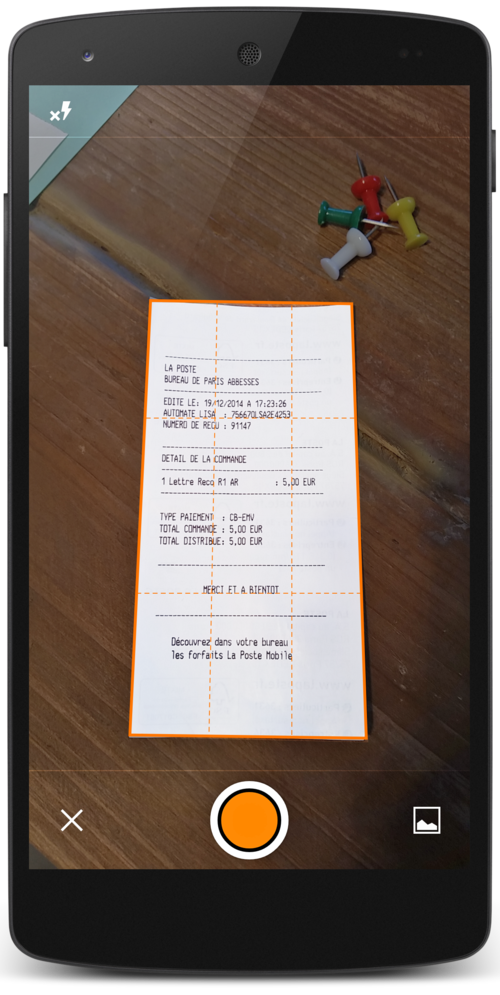
You will need to include the ScanFragment into an Activity that implements the ScanFragment.CameraCallbackProvider. You can refer to the ScanActivity class in the CustomDemo application for an example.
To enable or disable live document detection, use the method scanFragment.setRealTimeDetectionEnabled. And to implement auto trigger or react based on document detection events, set a listener and implement the callbacks with scanFragment.setBorderDetectorListener.
The edit frame screen lets the user adjust the auto-detected edges of a document.
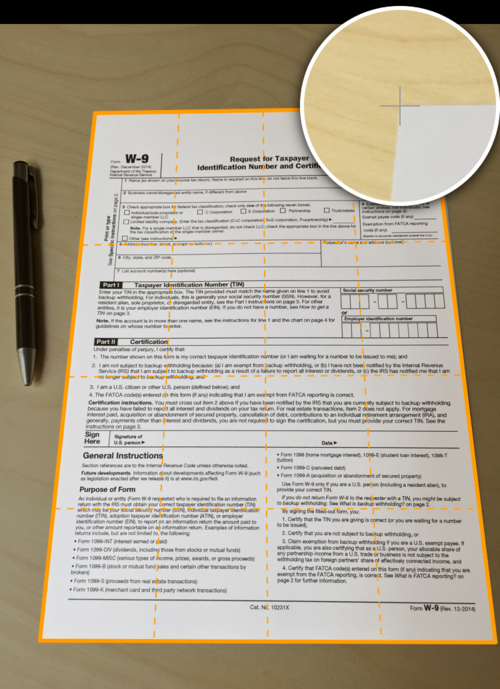
You subclass the BorderDetectionImageView and include it into an Activity layout. You can refer to the BorderDetectionActivity class in the CustomDemo application for an example.
The OCR module provides a way to extract text and its layout from scanned images. The extraction outputs the text in 2 different formats: raw text and XML containing both the text and its layout (also called hOCR). It’s then possible to generate a PDF document using this information to make it searchable and selectable.
Text Recognition relies on the Tesseract library and needs training data files on the mobile device. Training data files are specific for each language in which text needs to be recognized and are available on this page. You have to place them in a directory named tessdata on the device.
val ocrConfiguration = OcrConfiguration(listOf("eng"), tessdataDirectory)

val result = ocrProcessor.processImage(image, ocrConfiguration, progressListener)

val xmlTextLayout = result.textLayout
OcrConfiguration ocrConfiguration = new OcrConfiguration(Arrays.asList("eng"), tessdataDirectory);

OcrResult result = ocrProcessor.processImage(image, ocrConfiguration, progressListener);

String xmlTextLayout = result.textLayout;
PDF generation allows a text layout to be provided for each page of the document.
val page = PDFPage(image.getAbsolutePath(), A4_SIZE, xmlTextLayout)
// Generate PDF
PDFPage page = new PDFPage(image.getAbsolutePath(), A4_SIZE, xmlTextLayout);
// Generate PDF
By default, the PDF generation uses a standard font which supports English and Western European languages characters. If you perform text recognition for another language, you need to specify a font supporting this language’s characters when generating the PDF document.
© 2025 The Grizzly Labs. All rights reserved.