The SDK provides pre-built UI components that handle the complex camera and editing workflows while allowing full customization. These components give you the heavy lifting of camera management and document detection while you maintain complete control over the interface design.
The capture view displays a camera preview and handles the entire camera stack with automatic document detection. The view comes without any UI elements, giving you complete control over the interface design.
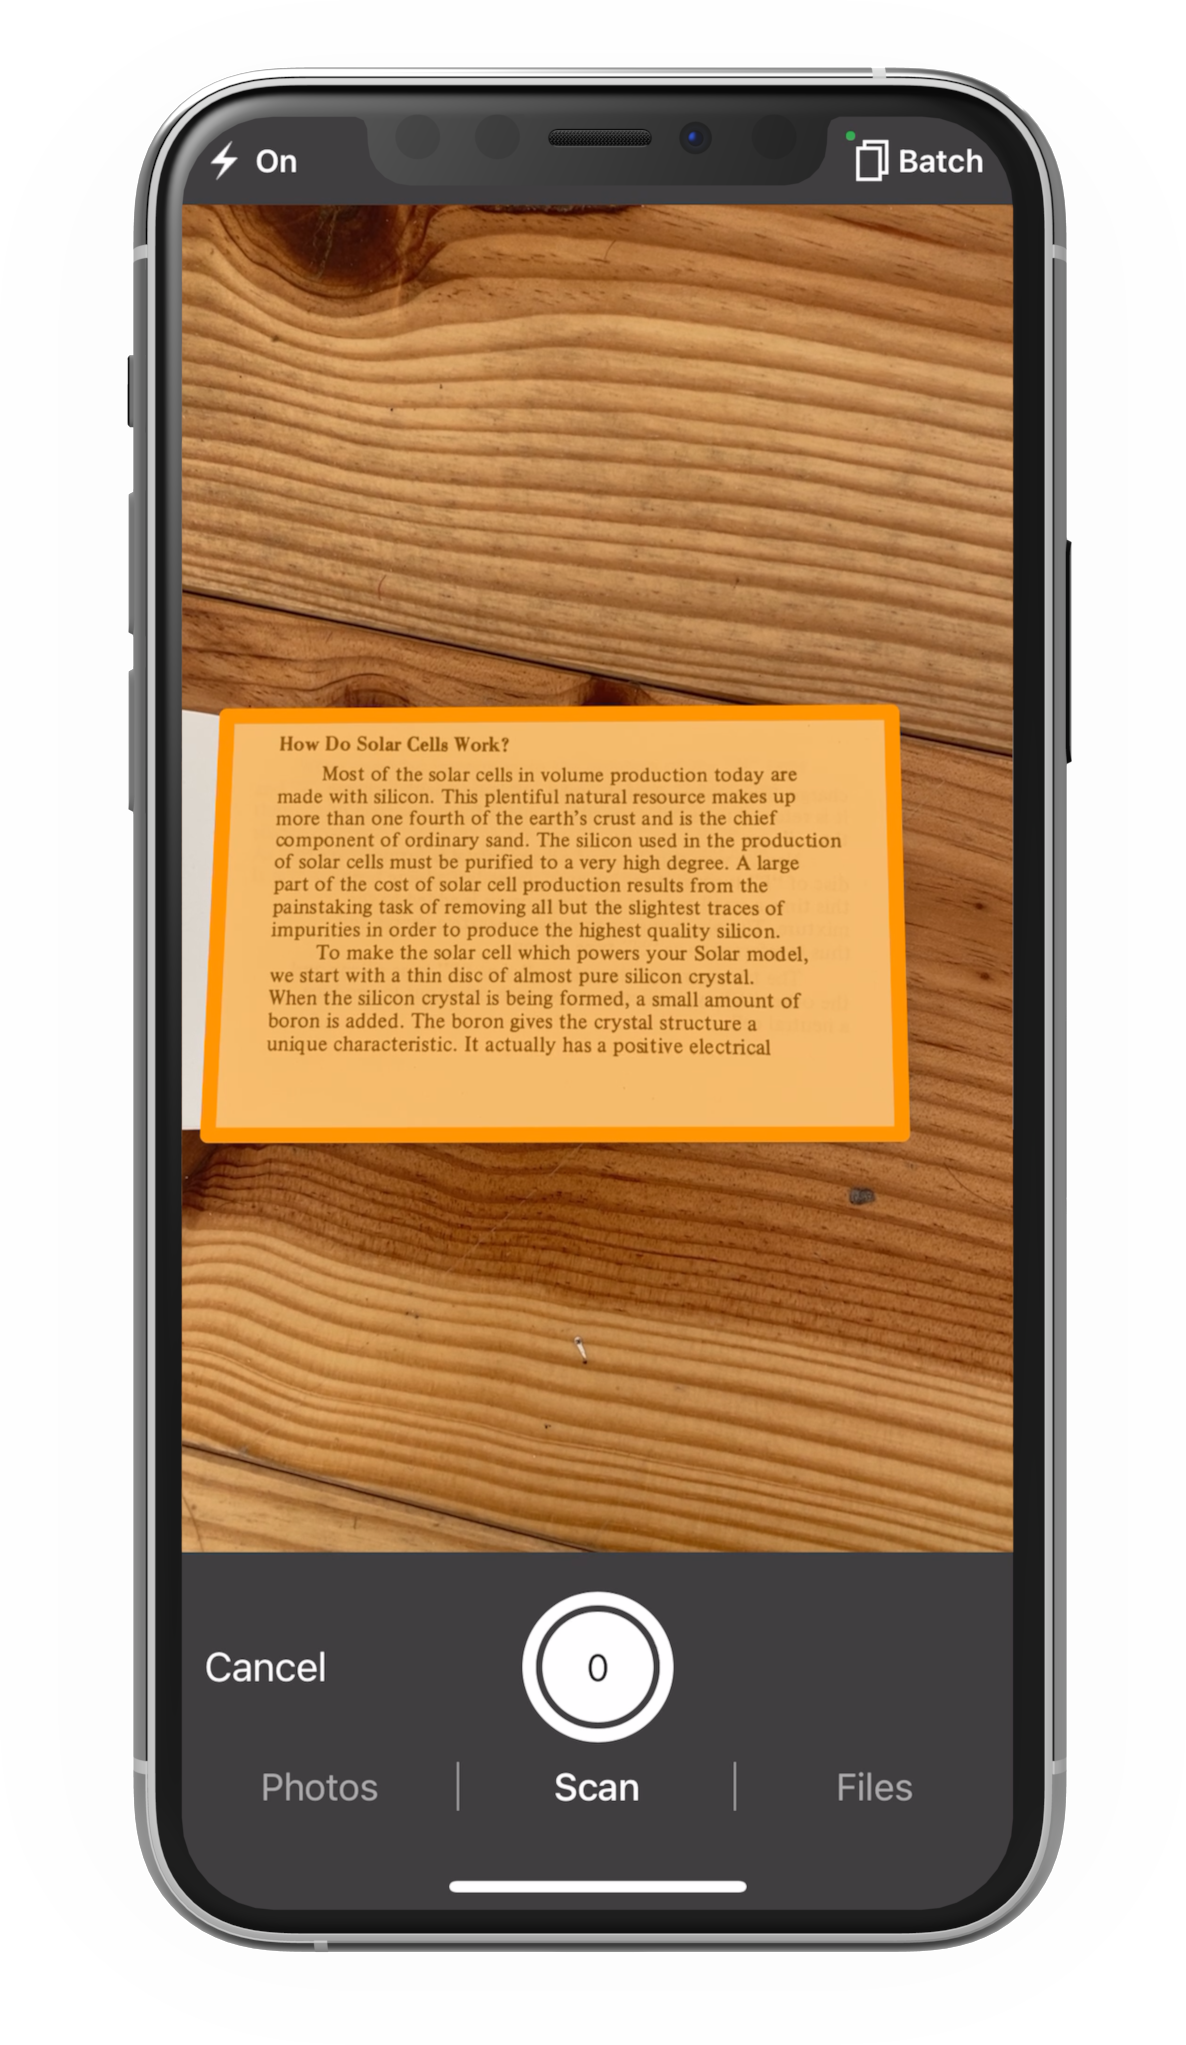
You subclass GSKCameraViewController and customize it as desired. You can refer to the CameraViewController class in the GSSDKCustomDemo for an example.
import GSSDK

class CustomCameraViewController: GSKCameraViewController {
    override func viewDidLoad() {
        super.viewDidLoad()

        // Disable autoresizing to take control of the layout
        cameraView.translatesAutoresizingMaskIntoConstraints = false

        // Add your custom UI elements here
        setupCustomToolbar()
    }

    private func setupCustomToolbar() {
        // Add buttons, controls, and other UI elements
        let captureButton = UIButton(type: .custom)
        captureButton.setTitle("Capture", for: .normal)
        captureButton.addTarget(self, action: #selector(captureDocument), for: .touchUpInside)

        view.addSubview(captureButton)
        // Add constraints...
    }

    @objc private func captureDocument() {
        // Trigger capture
        captureImage()
    }
}
Note that GSKCameraViewController sets up a cameraView that takes the entire screen. To add toolbars or other buttons, disable the cameraView’s autoresizing mask in your subclass’ viewDidLoad.
You need to create an instance of ScanFragment, configure it and include it into an Activity (or another Fragment) that implements the ScanFragment.CameraCallbackProvider. You can refer to the ScanActivity class in the CustomDemo application for an example.
import com.geniusscansdk.camera.ScanFragment;

class ScanActivity: AppCompatActivity(), ScanFragment.CameraCallbackProvider {
    private lateinit var scanFragment: ScanFragment

    public override fun onCreate(savedInstanceState: Bundle?) {
        super.onCreate(savedInstanceState)
        setContentView(R.layout.scan_activity)

        // Create and customize ScanFragment
        scanFragment = ScanFragment.createBestForDevice().apply {
            setDetectionMode(DetectionMode.Document)
        }

        // Include ScanFragment in layout
        supportFragmentManager
            .beginTransaction()
            .replace(R.id.scan_fragment_layout, scanFragment)
            .commit()
    }

    override fun onResume() {
        super.onResume()

        // Initialize camera after making sure permission is granted
        scanFragment.initializeCamera()
    }

    override fun getCameraCallback() = object: ScanFragment.Callback {
        override fun onCameraReady() {}

        override fun onCameraFailure() {}

        override fun onShutterTriggered() {}

        override fun onPreviewFrame(bytes: ByteArray?, width: Int, height: Int, format: Int) {}
    }

}
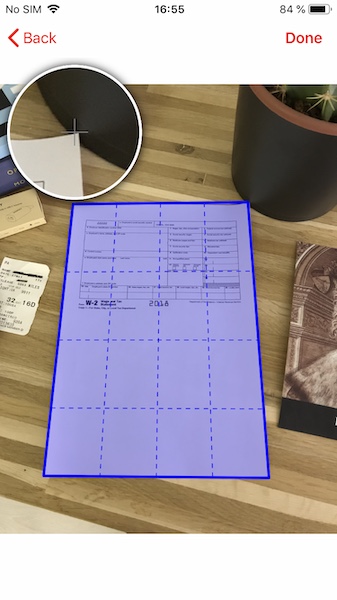
The edit frame screen allows users to manually adjust the auto-detected edges of a document for precise cropping. This is useful when automatic detection needs refinement or when users want to select a specific portion of an image.
You subclass GSKEditFrameViewController and customize it as desired. You can refer to the EditFrameViewController class in the GSSDKCustomDemo for an example.
import GSSDK

class CustomEditFrameViewController: GSKEditFrameViewController {
    override func viewDidLoad() {
        super.viewDidLoad()

        // Customize the edit frame interface
        setupCustomControls()
    }

    private func setupCustomControls() {
        // Add custom buttons, instructions, or styling
        let confirmButton = UIButton(type: .custom)
        confirmButton.setTitle("Confirm", for: .normal)
        confirmButton.addTarget(self, action: #selector(confirmSelection), for: .touchUpInside)

        view.addSubview(confirmButton)
        // Add constraints...
    }

    @objc private func confirmSelection() {
        // Get the adjusted quadrangle
        let adjustedQuadrangle = quadrangle
        // Process with the adjusted frame
        delegate?.editFrameViewController(self, didSelectQuadrangle: adjustedQuadrangle)
    }
}
You customize the BorderDetectionImageView and include it into an Activity (or Fragment) layout. You can refer to the BorderDetectionActivity class in the CustomDemo application for an example.
<?xml version="1.0" encoding="utf-8"?>
<LinearLayout
    xmlns:android="http://schemas.android.com/apk/res/android"
    android:layout_width="match_parent"
    android:layout_height="match_parent"
    android:orientation="vertical"
    >

    <!-- Surrounding layout -->

    <FrameLayout
        android:layout_width="match_parent"
        android:layout_height="0dp"
        android:layout_weight="1"
        >

        <com.geniusscansdk.ui.BorderDetectionImageView
            android:id="@+id/image_view"
            android:layout_width="fill_parent"
            android:layout_height="fill_parent"
            />

        <com.geniusscansdk.ui.MagnifierView
            android:id="@+id/magnifier_view"
            android:layout_width="166dp"
            android:layout_height="166dp"
            />
    </FrameLayout>
</LinearLayout>
import com.geniusscansdk.ui.BorderDetectionImageView;

class BorderDetectionActivity: AppCompatActivity() {
    private lateinit var imageView: BorderDetectionImageView
    private lateinit var magnifierView: MagnifierView

    public override fun onCreate(savedInstanceState: Bundle?) {
        super.onCreate(savedInstanceState)
        setContentView(R.layout.border_detection_activity)

        // Customize the image view
        imageView = findViewById(R.id.image_view)
        imageView.setOverlayColorResource(R.color.blue)


        // Plug with magnifier view
        magnifierView = findViewById(R.id.magnifier_view);
        imageView.setListener(MagnifierBorderDetectionListener(magnifierView));
    }
}
After implementing the UI components, continue with image processing to enhance the captured documents:
Start with a free trial license to test the SDK, or contact us directly for a custom quote tailored to your needs.
© 2026 The Grizzly Labs. All rights reserved.